Monday, November 29, 2010

Broccoli

My broccoli plants were gorgeous this year!  Each plant produced a big giant head...and all at the same time!  And they happened to be ready just before my husband and I were heading to North Carolina to meet our first grandchild.  So I had to do something with all this broccoli...and quick.  I only photographed one head, but I picked 4 heads of broccoli this size:


So the best thing to do with it all was to blanch and freeze it.  Easy enough.  Chop broccoli, boil a big pot of water, thoroughly salt the water, throw the broccoli in for 3-4 minutes, remove and plunge into an ice water bath, drain well, and place in freezer bags.  


 (As an aside, I "love" my FoodSaver at this time of year!)
 
And voila...blanched broccoli, ready to be frozen for future use.  I kept some out for dinner that night and some for my sister to eat while we were gone...she loves broccoli.


Now I have all this fresh broccoli to use this coming winter, mostly in soups...think Broccoli and Cheddar Cheese, Cream of Broccoli Soup with Roasted Garlic Crostini, Broccoli Soup Pureed with Onions, Garlic, and Potatoes...anyway, you get the picture; there are some good meals to be had with the frozen broccoli from my garden :)

Friday, November 26, 2010

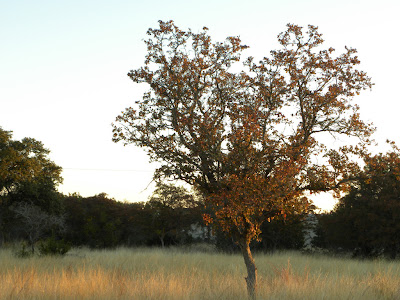
Fall in South Texas


As most of you know, fall is my favorite time of year.  For me, it's a time of reflection and gratitude for all the blessings in my life.  And I love the colors.  I grew up in Southeastern Massachusetts so I know what fall color looks like.  Although the colors of the South Texas fall are much more muted, they are in my opinion, equally stunning.  I was up and out very early one morning last week just to photograph what my neighborhood looks like at dawn at this time of year.  In my opinion, it was breathtaking.  Take a look.  (But remember, I'm not a professional photographer, I simply tried to capture what I saw.)


And I had this beautiful creature watching me as I crept around in the tall grass.  It's an American Kestrel and I see her often in the mornings.  I think she's beautiful.


I thought Thanksgiving Day was a good time to share what I saw that beautiful fall morning in the hills of South Texas.  Happy Thanksgiving to all.

Tuesday, November 23, 2010

Dew Covered Web

I was just leaving my garden early this morning when something caught my eye.  Look at this beautiful dew covered spider web I saw attached to the side of one of my fence posts:


It was foggy and warm this morning...perfect conditions for creating a lovely dew that adheres to everything it touches.  The dew looks like tiny diamonds hanging on to the web.  I think it's just beautiful.


I began looking around to see if I could find the architect of this gem.  But in looking closer, I discovered she was right there in the web, wrapped around whatever she caught for breakfast.  I don't mean to gross anyone out, but if you look closely, there she is.


I know spiders freak some people out; but to me, they are simply another creature sharing our Universe.  They have a distinct and worthwhile purpose and I consider it a blessing to have them in and near my garden.

I've been unable to figure out what kind of spider this is but she sure is pretty neat, and I'm glad I took the time to see her this morning. 


Saturday, November 20, 2010

Violas

...aren't they lovely?
I was at the nursery last week looking for a burst of fall color to put in my copper planter boxes that line the brick walls on my back patio when these beauties caught my attention.  They are Sorbet Black Duet Violas and when I saw them, I was hooked.

The Sorbet varieties tolerate cold weather better than other violas and here in the hills where the temperatures can get pretty chilly, that's important to me.  The plants are compact and are ideal for edgings or containers.  Plus, they just look so cheery and lighthearted to me.  Since I planted them, every time I'm out on the back patio (like every single day), they simply make me smile :)  


Wednesday, November 17, 2010

First Cabbage...


...And what a beauty, weighing in at 1lb 13 oz
Not too bad, eh? :)


My cabbage has done extremely well this year and I've managed to keep the cabbage loppers at bay (so far).  Instead of the usual cabbage dishes (think coleslaw), I wanted to try some new ways to prepare this nutritious green.

I've had my eye on this braised cabbage recipe in my favorite fall cookbook, All About Braising, by Molly Stevens that I've been waiting to try.  Well I cooked this dish, World's Best Braised Green Cabbage, this weekend and I'm totally hooked.  It may sound strange to cook cabbage this way, but it is absolutely delicious.  And E.A.S.Y.  After you make this dish once, you won't need the recipe...it's that simple and in keeping with my usual MO in cooking, it is made with basic pantry staples.  The long slow cook time brings out the natural, sweet flavors of the cabbage, onion and carrots. 


World's Best Braised Green Cabbage
Adapted from All About Braising, by Molly Stevens
1 medium head green cabbage (about 2 pounds)
1 large yellow onion, thickly sliced
1-2 carrots, cut into 1/4 inch rounds
1/4 cup chicken stock
1/4 cup extra virgin olive oil
Coarse salt & freshly ground black pepper
1/2 teaspoon crushed red pepper flakes (more if you like it a bit hotter)
Splash of balsamic vinegar

Heat oven to 325.  Lightly oil a large gratin dish or baking dish (9x13 inch Pyrex works well).

Peel off and discard any bruised or ragged outer cabbage leaves. Cut the cabbage into 8 wedges.  Arrange the wedges in the baking dish; they may overlap some, but do your best to make a single layer.  Save any leftover wedges for salad or coleslaw.


Scatter the onion and carrot over the top.  Drizzle the olive oil and stock over the entire dish.  Season with salt, pepper and red pepper flakes.


Cover tightly with foil, and slide into the middle of the oven to braise until the vegetables are completely tender, about 2 hours.  Turn the cabbage wedges with tongs after about an hour.  Don't worry if the wedges want to fall apart as you turn them; just do your best to keep them intact.  If the dish is drying out at all, add a few tablespoons of water.

Once the cabbage is completely tender, remove the foil and increase the oven temperature to 400.  Add the balsamic vinegar, turn the cabbage to distribute the vinegar, return braise to oven and roast until the vegetables begin to brown, another 10-15 minutes or so.

Serve warm or at room temperature.  To guild the lily, add a sprinkle of fleur de sel.

 You may never eat cabbage any other way :)

Buon Appetito!

Sunday, November 14, 2010

First Frost of the Season

The hills of Boerne had its first frost this past weekend and although the temperature warmed up into the mid 70's later in the day, it was a beautiful, but chilly, way to begin a fall day.


And the fall vegetable garden doesn't mind the frost.  In fact, the cabbage, broccoli, beets and Brussels sprouts actually like a frost.  It does something to the vegetables to make them a bit tastier.  And it's so pretty too :)


Frost-covered lantana

And beautiful old boy Tyson is always close by as I made my way around the property this frosty fall morning.


Thursday, November 11, 2010

Last of the Peppers

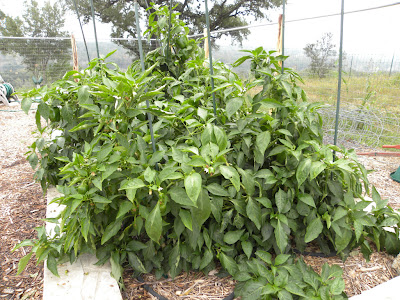
Can you believe this haul?  I had an incredible bounty of peppers this year.  Of course I planted 8 plants so what did I expect?  My sister and I counted them and we had 145 peppers, yes, that's correct, 145.  Some of them were pretty small, but still, that's an enormous amount of peppers! 


We were expecting our first freeze last night so I picked all the peppers that were left on the plants.  Peppers don't like frost and my plants were too huge to cover.  I had no choice but to pick them.


OK, Diane...what did you do with 145 peppers?  Well, we kept some of the bigger ones out to make my husband's favorite dish, stuffed peppers, and the rest we cleaned, roasted and froze.  At the end of the day I put up 19 bags of roasted peppers.

Not too bad for a couple of hours' work.  Now I'll have roasted peppers to use through the winter in stews, soups, sauces, frittatas, omelets, etc.  But next year, I don't think I'll plant 8 peppers plants :)

Monday, November 8, 2010

Preserved Lemons


You all know how productive my lemon tree is this year.  I bet there are 50+ lemons on my tree waiting to be picked and made into something delicious.  And that's one of the biggest reasons I garden (besides the sheer love of it):  To use what I grow in interesting and tasty dishes; and hopefully to pass on a recipe or two to anyone interested in trying something new.  

Salt preserved lemons are a unique and delicious way to use organic lemons.  Although a bit unusual, there are many ways to use this savory treat.  Think of them like candied lemons, only cured with salt instead of sugar.

Salt preserved lemons are staples of Moroccan cooking.  They are difficult to find in grocery stores and you usually have to seek out a specialty store to find them.  That's why when I have an abundance of lemons, I simply prefer to make my own.  Even though they require a three-week wait to cure, they're worth it.  It's best to use smaller lemons for this recipe, about 2-3 inches long because they fit more neatly in a one-pint jar.  And since you'll be eating the peel, it's best to buy organic lemons that you know are free of any harmful sprays, which I'm proud to say mine are :)

Salt Preserved Lemons
Adapted from Molly Stevens, All About Braising
The ingredient list is really very simple

3-5 small organic lemons (about 4 ounces each)
2/3 freshly squeezed lemon juice (from about 3-4 small lemons)
1/4 cup coarse salt

Wash a wide-mouth 1-pint glass jar and lid in very hot soapy water.  Rinse well.  Leave them to dry upside down on a clean towel.

Rinse the lemons and scrub them with a vegetable brush.  If the lemons aren't organic, you may want to use a little dish detergent to remove any pesticide residue.  Rinse well.  Cut the lemons into quarters and place them in a glass bowl.  Add the salt and toss the lemons with a rubber spatula to coat them with the salt.

With impeccably clean hands, arrange about half of the lemon quarters in the jar, compacting them as best you can.  After you've fitted half the lemon quarters in the jar, sprinkle over some of the salt from the bottom of the bowl,

then fill the jar with the remaining lemon quarters.  When all the lemons are in the jar, use a rubber spatula to scrape the remaining salt from the bowl into the jar.

Pour enough lemon juice to cover the lemons, leaving about 1/2 inch head-space.  Wipe the rim with a damp paper towel.  Screw the lid tightly.

Set the jar in a dark cupboard to pickle for at least three weeks.  Turn the jar every 10 days or so to redistribute the salt and let it sit for a few hours, then turn the jar upright again.

To use the preserved lemons, pull a lemon quarter from the jar with, again...impeccably clean fingers, or tongs.  Rinse under cool water and slide off the pulp.  Use only the pickled peel.  Once you've opened the jar, store the lemons in the fridge for up to 1 year.

OK, you say, what "to do" with the preserved lemons?  Well, as soon as they are ready, I plan to make this fabulous braised dish, Moroccan Chicken with Green Olives and Preserved Lemons, and is it ever delicious.  Stay tuned, I'll post that recipe when I make the dish.  It's a perfect fall Sunday supper.  And there are other things to do with the preserved lemons that I'll continue to post as I make the dishes.

If you have an abundance of lemons on your tree or have the opportunity to buy some organic ones at your local farmer's market, I encourage you to try this unique culinary treat.  I doubt you'll be disappointed.